
How to Start Trading Crypto in 2026? Beginner’s Guide

Key Takeaways
- 🛫 Crypto trading and crypto investing are not the same activity. Trading is short-term and execution-sensitive; investing is long-term and custody-sensitive.
- 🛫 Beginners should start with spot trading before touching margin trading, perpetual futures, or leverage.
- 🛫 Your first exchange account should be selected based on region support, fiat on-ramping, liquidity, transparent fees, withdrawal rules, and security controls.
- 🛫 The core process is simple but strict: choose a liquid pair, understand base asset vs. quote asset, use the correct order type, monitor fills, and record fees.
- 🛫 Risk management is not only a stop-loss order. It also includes position sizing, emotional discipline, drawdown limits, and safe custody.
- 🛫 Small accounts require extra fee discipline because maker fee, taker fee, spread, withdrawal fees, and slippage can consume a large share of capital.
Disclaimer
Crypto trading involves substantial risk, including the possible loss of capital. This guide is educational and does not constitute financial, investment, legal, or tax advice. Exchange availability, fees, verification requirements, and trading products vary by jurisdiction and can change over time. Always verify account rules directly with the exchange you use, start with small amounts, and never trade money you cannot afford to lose.
Like using crypto, trading it can seem intimidating to someone with no experience but it is really not something too hard to grasp. For one, the crypto market is open 24/7, but this does not mean it needs constant screen time. By the end of this guide, you will be able to open an exchange account, fund it, place a first spot order, and manage downside risk on your own.
The first lesson that should tell you what our guide is all about: start small and treat your first few trades as skill-building exercises, not income replacement. Sounds boring but that mindset will do more for your learning curve than chasing quick gains ever will.
Crypto Market Basics
Crypto Trading vs. Investing
The first decision is not which coin to buy. It is which time horizon you are operating on, because later that choice determines what to protect your capital from.
Trading typically operates on a minutes-to-weeks horizon. You are trying to capture short-term price movement, which means your primary risks are execution-related: trading fees eating into thin margins, so does slippage on entries and exits, and the mechanical cost of being wrong about timing can stack.
Investing operates on a months-to-years horizon. Here, you are underwriting a thesis about long-term adoption or value accrual, and your primary risks shift to custody — who actually holds your keys — and drawdowns, meaning whether you can psychologically and financially survive a 60–70% decline while holding.
A common beginner misclassification is treating a long-term hold as a trade without ever setting an exit plan: buying Bitcoin “for the long term” but panic-selling on the first 15% dip because there was never a defined thesis or time frame to fall back on. The reverse is a mistake, too: treating a trade like an investment after it loses money. A short-term position goes red, and instead of respecting the original exit plan, the trader relabels it a “long-term hold” purely to avoid realizing the loss. Conflating the two approaches, especially under stress, is one of the fastest ways to turn a small, planned risk into an unplanned, open-ended one.
Market Structure
In contrast to traditional ones, crypto markets run through two structurally different venue types, and understanding the mechanics matters before you fund an account.
A centralized exchange (CEX) holds custody of your funds on your behalf. You deposit assets, the exchange credits your account internally, and your order interacts with the exchange’s own matching engine and order book. A decentralized exchange (DEX) has no central custodian. You connect a self-custody wallet, and trades execute directly against a smart contract — typically a liquidity pool — recorded on-chain on a blockchain.
On a CEX, you are trusting the platform’s solvency and security. On a DEX, you are trusting the underlying smart contract code and paying network gas fees for every transaction.
Whichever venue you use, someone or something is always on the other side of your trade. That counterparty could be other retail traders, professional market makers who quote continuous buy and sell prices to earn the spread, or arbitrageurs who exploit small price differences between venues. This constant activity from market makers and arbitrageurs is precisely why liquidity exists and why spreads tend to narrow on higher-volume assets. More competing participants usually means tighter, more efficient pricing.
To see this mechanically, look at the order book: a live list of buy orders, called bids, and sell orders, called asks, stacked by price. The gap between the highest bid and lowest ask is the bid-ask spread, and it is a direct, built-in cost of trading.

Liquidity refers to how much volume sits near the current price. Deep liquidity means large orders can fill without moving the price much; thin liquidity means they cannot. For example, buying $100 worth of a high-volume major crypto asset like Bitcoin or Ethereum will typically fill close to the quoted price, because there is ample supply sitting in the order book near that level. Buying $10,000 of a thinly traded token, however, can force your order to “walk the book” — consume worse and worse-priced asks until the order fills. The result is slippage, meaning your average execution price ends up noticeably worse than the price you saw when you clicked buy.
Not everything traded in crypto is the same product, either. Spot trading means buying or selling the actual underlying asset for immediate settlement. You own the coin or a claim to one. Derivatives, including margin positions and perpetual futures, let you gain exposure to price movement using borrowed capital or contracts rather than owning the asset itself. As a beginner, spot trading crypto is the more transparent starting point.
Price Drivers
As far as influence on price is concerned, crypto is also different from regular markets. The common factors are:
- Market-wide liquidity / risk-on-risk-off — broad macro conditions, like falling interest rates or loosening monetary policy, tend to push capital into risk assets across the board, lifting most of the market together regardless of individual project fundamentals.
- Token-specific supply/demand — mechanics unique to a given asset, such as a large token unlock releasing millions of previously locked coins into circulating supply, which can pressure price downward simply by increasing available supply.
- Narrative/news — headline-driven catalysts like a major exchange listing a new token, which suddenly expands its accessible buyer base and can spike price on demand alone.
- Microstructure — short-term mechanical effects such as a wave of leveraged liquidations cascading through thin order books, amplifying a price move far beyond what spot demand alone would justify.
Two of these mechanisms deserve closer attention because they are often misunderstood as simple “good news/bad news” events rather than structural changes. An exchange listing does not just generate hype but mechanically expands who can access and trade the token, pulling in new liquidity and new marginal buyers that were not there before. A delisting does the reverse, cutting off access and often draining liquidity overnight.
Similarly, stablecoin flows and fiat on-ramping activity — money converting into a stablecoin before rotating into other assets — represent real, immediate buy-side pressure entering the market. That is different from speculative narrative alone.
Volatility
One of the cliches in disclaimers aimed at prospective traders is “crypto is volatile,” and this bears telling upfront and repeating for a reason. Volatility describes how wide a price range an asset moves through and how quickly it gets there. A high-volatility asset can swing double-digit percentages within hours.
This matters practically in two ways for beginners. First, in a highly volatile market, short-term price noise can trigger stop-losses that are placed too tightly, closing out a position on a temporary wick before the underlying move even plays out. Second, position size matters more than being “right” about direction. A correct call sized too large can still produce an outsized loss if volatility moves against you before it moves in your favor.

One useful pattern to internalize: volatility tends to cluster. Large price moves are often followed by more large price moves rather than an immediate return to calm. Gaps and liquidity holes — sudden price jumps with little trading in between — are also far more common in smaller-cap tokens with thin order books than in high-volume majors.
This is a practical reason beginners are often steered toward higher-volume, higher-market-capitalization assets like Bitcoin or Ethereum early on. The price action, while still relatively volatile, tends to be comparatively more continuous and easier to reason about, and their larger market capitalization generally correlates with deeper liquidity than smaller, thinner-traded tokens.
So far we have established the basic venue, pricing, and movement mechanics. The next layer is operational: choosing an exchange, verifying your account, and funding it without creating avoidable risk.
Exchange Account Setup
Exchange Selection
Ideally, your first exchange has to be one of the best crypto exchanges so that your journey starts smoothly. Regardless, before you create an account anywhere, run through this checklist. Each item is something you can verify from the exchange’s public website or support pages — no account required.
- Region and verification tier support — Confirm the exchange operates in your country or region and check what identity verification level is required before you can deposit or withdraw. Some venues gate withdrawals behind higher KYC tiers than deposits, which can trap funds temporarily if you did not check first.
- Fiat on-ramping options — Look at what fiat currency deposit methods are supported, including ACH, SEPA, wire, and debit/credit card, and how long each takes to settle. Bank-based fiat on-ramping is typically slower but cheaper; card funding is near-instant but usually carries a higher fee.
- Liquidity proxies — Before committing, check 24-hour trading volume on the specific pair you intend to trade, plus the visible order book depth and spread. High trading volume and tight spreads are a reasonable proxy for a healthy, liquid market on that pair.
- Transparent fee schedule — Confirm the exchange publishes a clear fee schedule covering maker fee and taker fee rates, deposit/withdrawal charges, and any spread or instant-buy markup. If you cannot find this information without logging in, treat that as a yellow flag.
- Asset/pair support — Verify the exact coins and trading pairs you plan to use are actually listed — not just the underlying asset, but the specific pair, such as BTC/USD vs. BTC/USDT.
- Withdrawal options and minimums — Check both fiat and crypto withdrawal minimums and available methods. Some exchanges impose minimums high enough to strand small test amounts.
- Support and account recovery — Confirm there is a working customer support channel and a documented account recovery path in case you lose access.
- Platform access and interface tiers — Check whether the exchange offers both web and mobile access, and whether it has separate “simple” and “advanced” trading interfaces. This matters more than it sounds.

Any crypto exchange typically has three distinct fee layers that beginners conflate: trading fees — maker fee/taker fee, charged on the advanced order-book interface; spread or instant-buy fees — baked into the price on simplified “buy” buttons; and withdrawal fees — flat or network-based charges to move funds out. An exchange can advertise low maker/taker fees on its advanced interface while its one-click “buy” button on the simple interface prices through a wider spread. In practice, you pay more even though the venue is technically “low-fee.” Always check which interface you will actually be using before assuming the advertised rate applies to you.
As a reference point for how much this varies venue to venue, one fee benchmark report covering 33 exchanges found an average base spot taker fee of 0.151%, while some venues advertised spot maker fees as low as 0.00% that in reality come conditionally.
Account Registration
Once you have picked an exchange, the signup flow generally follows this path:
- Sign up on a trusted device and network. Fraud-detection systems on most exchanges flag accounts that show frequent IP or device changes in the first days after signup, which can trigger extra verification holds. Complete registration from your usual device and home or known network.
- Enter your email and verify it. You will receive a confirmation link or code. Check spam folders if it does not arrive within a few minutes.
- Verify your phone number. Most exchanges require SMS or app-based confirmation as a second identifier tied to your account.
- Create a strong, unique password. Use a password manager rather than reusing a password from another service. Credential-stuffing attacks against reused passwords are one of the most common ways exchange accounts get compromised.
- Enable two-factor authentication (2FA) immediately during signup, ideally via an authenticator app rather than SMS alone, since SMS can be intercepted through SIM-swap attacks.
- Create a dedicated account credentials record. Store your backup/recovery codes, 2FA backup keys, and account recovery information in a password manager’s secure notes feature or a similarly access-controlled location — separate from your regular notes app.
Identity Verification
To go through a “Know Your Customer” identification procedure, you will need a valid government-issued photo ID: passport, driver’s license, or national ID card. What you do with it is make a selfie or short video for facial verification, matched against your ID photo. Sometimes, a proof-of-address document, such as a utility bill or bank statement, can be requested. Most exchanges require this to be dated within a recent window, often the last 90 days.
To increase your chances of this proceeding quickly and smoothly and avoid rejections, make sure your legal name and address match exactly across every document you submit. A shortened first name or an old address on one document is a common rejection trigger. Take your selfie in even, natural lighting against a plain background, with your full face unobstructed and no glare on your ID. Double-check your proof-of-address document falls inside the exchange’s stated recency window before uploading it.

If verification fails, work through this troubleshooting ladder rather than resubmitting the same files repeatedly:
- Re-upload clearer, higher-resolution images with better lighting.
- Check that your name formatting — middle names, hyphenation, accents — matches your ID exactly.
- Contact support directly and ask which specific check failed.
- If the exchange still will not clear your verification, try an alternative on-ramp or exchange that accepts your document type.
If this sounds like a hassle, you can get limited access on no-KYC crypto exchanges. Just keep in mind that most of the time, this is a compromise rather than a full opt-out.
Fiat and Crypto Deposits
Once your exchange account is set up, the next step is to top it up.
Bank transfer, including ACH, SEPA, or wire, is generally the cheaper but slower option for fiat deposits. Settlement can take anywhere from same-day to several business days. Card deposits settle almost instantly but usually carry a higher fee and can trigger fraud holds or chargeback-related freezes if the exchange’s risk system flags the transaction.
For your first deposit, send a small test amount rather than your full intended balance, and confirm you can also withdraw it successfully. This validates the entire on-ramp and off-ramp path before you commit real size.
If it is not your first purchase and you are moving crypto in from another wallet or exchange rather than funding with fiat currency, before sending anything meaningful:
- Select the correct network for the asset, such as ERC-20 vs. TRC-20 for a USDT deposit.
- Confirm the destination address format matches what the network expects.
- Check whether a memo or tag is required. Some networks need this alongside the address, and omitting it can mean funds arrive but are not credited to your account.
- Send a small test transfer first, confirm it arrives and is credited, then send the remainder.
Network mismatches — sending an asset over the wrong network to a correctly-formatted address — are one of the most common and irreversible ways beginners lose funds during their first deposit. Treat the test transfer step as non-negotiable rather than optional caution.
Once your account is funded and your intended trading pair is confirmed, order execution becomes the next skill: choosing the right pair, selecting a market order or limit order, and closing the loop without confusing base and quote.
First Spot Trade
With your account funded, placing your first spot order comes down to three decisions: trading pair, order type, and how you will watch and eventually close the position. Most beginner losses at this stage are not caused by bad luck but by clicking the wrong field, using the wrong order type, or misunderstanding what the interface is asking for.
Major Coins and Trading Pairs

Actually, the first decision is a series of smaller decisions:
- Quote currency choice (USD vs. USDT/USDC): Trading against USD shows prices in plain dollar terms with no extra step, while trading against a stablecoin like USDT or USDC means your price is quoted in that stablecoin. Functionally, the values are similar, but it adds a mental conversion step if you are used to thinking in dollars.
- Verify liquidity on the exact pair, not just the coin: A coin can be highly liquid overall while one specific pair for it is thin. Check 24-hour volume and order book depth on the exact pair you intend to trade.
- Confirm the pair is spot, not perpetual or margin: Exchange interfaces often list spot and derivatives pairs side by side, sometimes with near-identical tickers. Double-check you are on the spot order book before entering a size.
- Match the pair to your actual holdings: If you are funded in USDT, trading a USD-quoted pair may require an extra conversion step you did not plan for.
Say you are buying Bitcoin with Tether on the BTC/USDT pair. Here, Bitcoin (BTC) is the base asset — what you are acquiring — and Tether (USDT) is the quote asset — what you are spending. We will carry this exact example through order placement, monitoring, and closing.
Market Orders and Limit Orders
Once your pair is selected, you choose between a market order and a limit order — the two basic order types available on virtually every exchange interface.
A rule of thumb is to use a market order when immediacy matters more than exact price and the order book is deep enough to fill without much slippage. A limit order is for when price matters more than speed and you are willing to wait for the market to come to you.
| What you control | Main risk | Best for first trade when… | |
|---|---|---|---|
| Market | Timing — fills immediately | Price — slippage on thin books | You want the position now and the pair has strong liquidity |
| Limit | Price — you set the exact entry | Timing — may never fill | You can wait and want a specific entry price |
Many order entry screens let you size your order in either the base asset (BTC) or the quote asset (USDT/USD), often via a small toggle you can miss. Going back to the example, entering “1” into a field you assume is USDT but is actually set to BTC means you have just tried to buy 1 whole Bitcoin, not $1 worth. Always confirm which field is active before confirming the trade.
One more distinction matters at the order-type level. A market order typically executes as a taker because you are taking liquidity already sitting in the book. A limit order can execute as a maker if it does not fill immediately and instead rests on the book waiting for a match. This taker/maker distinction affects execution behavior here; the fee implications are covered separately later.
Position Monitoring

After your order executes, monitoring routine takes three steps:
- Fill confirmation — Check your Orders tab, or order history, to confirm the trade actually filled and at what size. Do not assume a submitted order filled just because you clicked confirm.
- Average entry price + fees — Look at your Positions/Assets view for the average price you paid and the fees deducted, since a market order on a fast-moving book can fill across multiple price levels.
- Unrealized P&L vs. last price — Compare your entry against the current market price to see your live, unrealized profit or loss.
Unrealized P&L shown on screen can look modestly positive while the position is actually underwater once fees and spread are accounted for. Before assuming you are in profit, check both your actual execution price and total fees paid to understand your real breakeven point — not just the headline number.
Trade Closing
Closing your BTC/USDT position can go one of two ways, and the right choice depends on intent. Selling BTC back into USDT or USD is the simpler flow for a beginner. You return to the same currency you started with, closing the loop cleanly. Selling BTC directly into Ethereum, for example, is a portfolio-intent move — rotating exposure from one asset to another — rather than a simple close.
Keep base vs. quote in mind here. If you meant to simply exit BTC back to a cash-equivalent and instead select a BTC/ETH pair by habit, you have closed into a different asset rather than out of the trade entirely.
For every trade, note down these four fields: pair traded, order type (market/limit), entry/exit prices, total fees. Keeping this record consistently is what turns your first few trades into a usable feedback loop rather than a blur of clicks.
Beginner Trading Strategies
With the first spot trade completed, the next question is what you are actually trying to do with subsequent trades. Beginners tend to skip this step and jump straight into buying whatever is moving. That is how a trading account turns into a collection of unrelated bets.
Picking a defined strategy lane — and staying in it long enough to learn its failure modes — matters more at this stage than picking the “right” one.
Day Trading and Swing Trading
Day trading means opening and closing a position within the same day, sometimes within minutes or hours. It typically involves multiple decisions per day: watching price action continuously, entering and exiting several times in a single session.
The primary failure mode for beginners here is overtrading. This means reacting to normal intraday noise as if it were a signal, while racking up fees and slippage across trades that never had a real edge behind them. The minimum viable routine is demanding. It requires dedicated screen time during active market hours, since a day trade left unattended can move against you before you notice.
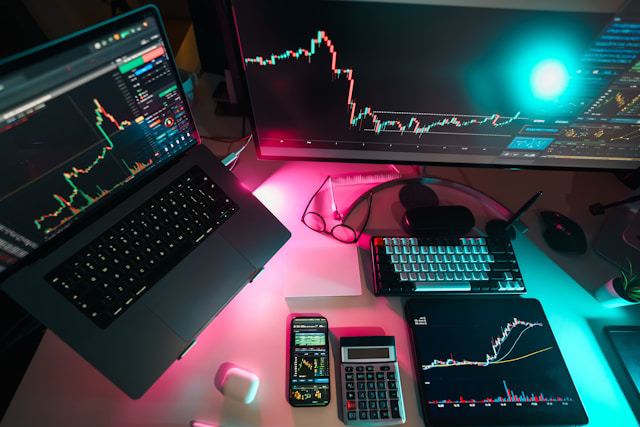
Swing trading means holding a position for several days to a few weeks, aiming to capture a larger directional move rather than intraday noise. Decisions here happen far less often — maybe a handful per week, sometimes just one entry and one exit for the entire trade.
The primary failure mode for beginners is the mirror image of day trading’s problem: holding through invalidation. The original thesis has already broken down, but the trader keeps holding anyway because the multi-day timeframe makes it easier to rationalize that “it just needs more time.” The minimum routine is lighter. Checking in once or twice a day is generally enough, since you are not reacting to every tick.
Choose one lane for 30 days. Mixing day trading and swing trading in the same week — or worse, in the same position — is one of the fastest ways to lose the thread on your own strategy. A trade that starts as a quick day trade and gets held “just in case” because it is down, or a swing setup that gets closed early because intraday volatility spooked you, is not really either strategy. It is an unplanned trade wearing a strategy’s name.
Technical Analysis Basics
Beginners often try to learn technical analysis by loading up a chart with every technical indicator available. Usually, this produces conflicting signals and decision paralysis rather than clarity. A more workable starting point is a minimum viable TA stack limited to three primitives, applied consistently rather than swapped out for something new every week.
Trend is the general direction price has been moving over your chosen timeframe — up, down, or sideways. The common misread is treating every short-term wiggle as a trend change, when it is often just normal noise within the larger direction.
Support and resistance describe price zones where buying or selling pressure has historically been strong enough to pause or reverse a move. A support zone is where price has previously found buyers, and a resistance area is where it has previously met sellers. The common misread is drawing too many levels on a chart, turning every minor pause into a “key level” until the chart is so cluttered that the levels lose any predictive meaning.
Candlesticks are the individual price bars on a candlestick chart, each showing the open, high, low, and close for a given period. Not every single candle is a standalone signal. A single candle’s shape means far more in the context of where it forms — for instance, near a support zone or resistance area — than it does in isolation. Once you are more comfortable with these patterns, you can check out our candlestick pattern guide to learn when they can act as signals.
What you should do with these three in mind is identify the prevailing trend, find where price is approaching a support zone or resistance area relevant to that trend, and use a candlestick pattern at that level as your trigger to act. Do not trade trend, level, or candlestick signals independently of one another.

On top of this three-part stack, beginners should start with zero or, at most, one additional technical indicator — nothing more. Before adding any indicator beyond that, apply this pass/fail rule: it must change a decision you are already making — entry, exit, or no-trade — not simply add another line to the chart that confirms what the trend, level, and candlestick already told you.
Paper Trading
Before risking real capital on a chosen strategy lane, run a structured paper trading protocol for 7 to 14 days. A paper trading setup is a demo account for simulated trading where trades execute at real-time prices without real money at stake.
Pick one major pair and watch only that pair for the full protocol. Jumping between assets defeats the purpose of building pattern recognition on a single, familiar market. Set a hard limit on trades per day or per week. For a day-trading lane, something like 3–5 trades per day; for a swing lane, 1–2 entries per week. This cap exists specifically to prevent random clicking disguised as “practice.”
For every trade, record exactly six fields — no more, no fewer: setup type, timeframe, entry trigger, planned exit condition, actual outcome, and lesson. This schema forces you to articulate the plan before the trade and the takeaway after, rather than just logging a win or loss. Once you have completed a set number of trades — for example, 20 — while consistently following your plan and filling out the full journal schema each time, you are ready to consider moving to live capital. The rule is about consistent process, not a target win rate.
One warning specific to paper trading crypto: demo fills often ignore real-world slippage and spread, and they carry little to none of the emotional pressure of watching actual money move. A limit order that fills instantly and cleanly in a demo environment may not fill at all — or may fill at a worse price — once real order flow and real nerves are involved.
To counter this, practice using limit orders during your paper trading protocol rather than only market orders. Once you do go live, log both your intended fill price and your actual fill price side by side in your journal. The gap between the two is real information about your execution, not noise to ignore.
Choosing a strategy lane and practicing it deliberately only matters if every live trade has a predefined exit, controlled position size, and custody plan behind it.
Risk Management and Crypto Asset Security
Crypto trading is not set-and-forget, as you’d expect. Heightened volatility and technical challenges mean that you have to take active measures to avoid real risks.
Risk management has two halves. The first is trade-level downside control: stop-losses, take-profit orders, position sizing, and drawdown rules. The second is custody risk: where your assets sit when you are not actively trading them.
Stop-Loss and Take-Profit Orders

If market and limit orders are basic types, these are a bit more advanced but extremely handy. A stop-loss order closes your position automatically once price hits a level you define, capping how much a single trade can cost you. A take-profit order does the mirror opposite. It closes the position once price reaches a target, locking in gains without requiring you to watch the screen.
Neither order type is a replacement for a complete exit plan:
- Invalidation stop — the price level at which your original trade idea is simply wrong. This is where your stop-loss order goes. It should not be based on how much money you are comfortable losing; it should be based on the point where the setup itself has failed.
- Profit-taking plan — a single take-profit target, or a staged plan that closes part of the position at one level and lets the remainder run to a second level. Decide this before entry, not while watching the position move in your favor.
- Contingency for fast moves — a predefined fallback for when price gaps or drops sharply through your levels rather than approaching them gradually. This is where your choice of stop type actually matters.
A stop-limit order guarantees the price, or better, but not execution. If the market drops through your limit price without trading at it, the order simply sits unfilled while your position stays open. Its alternative is a stop-market order, which guarantees execution once triggered — it will close your position — but not the price you get, since it becomes a market order and can fill worse than your stop level during a fast move.
Picture a sudden flash-crash-style drop through a thinly traded book: your stop-limit is set at $95 with a limit of $94.50, but price gaps straight from $96 to $92 without ever printing at $94.50. The order never fills, and you are still holding the position well below where you intended to exit. That scenario is exactly why stop-market is the more common default for beginners prioritizing certainty of exit over certainty of price.
Nevertheless, none of this matters if your position size is wrong to begin with. A stop-loss without proper sizing behind it is close to meaningless, since even a well-placed stop can still produce an outsized loss if the position itself is too large relative to your account. A widely repeated rule of thumb — risk no more than 1–2% of your total portfolio on any single trade — is a reasonable starting anchor, but it has to be adapted to the asset’s volatility and the actual distance to your invalidation stop, not applied as a fixed dollar amount regardless of setup.
Emotional Trading
Emotional trading is rarely a single dramatic mistake. It is usually a repeated, small pattern of reacting instead of following the plan you already set. The fix is not willpower; it is pre-committing to a specific replacement action for each common trigger, so there is a rule to follow instead of a decision to make in the moment.

- Trigger: FOMO after a sharp green candle → Rule: wait a fixed few minutes and re-check your original plan → Action: set a limit order at your planned entry price, or stand down and skip the trade entirely.
- Trigger: Price dips right after you enter → Rule: check whether the dip breaches your invalidation stop or not → Action: if it does not, leave the position alone; if it does, let the stop do its job rather than intervening.
- Trigger: A losing trade makes you want to “win it back” immediately → Rule: enforce a mandatory walk-away timer before placing another trade → Action: close the platform for a set period and write a journal note on what happened before re-entering the market.
- Trigger: Watching an open position tick in real time is causing you to second-guess a plan that has not actually been invalidated → Rule: reduce exposure to the information, not the position → Action: step away from the live chart and check back only at a predetermined interval.
- Trigger: Multiple pending limit orders sitting unfilled starts to feel like missed opportunity → Rule: re-verify each order still matches your current plan → Action: cancel any pending orders that no longer reflect a thesis you would still enter fresh today.
One specific, non-obvious mistake pattern deserves its own callout: moving your stop-loss farther away mid-trade to “avoid getting stopped out.” This is not risk management. It is widening risk after the fact to avoid admitting the trade may be wrong, and it turns a defined, planned loss into an open-ended one.
The corrective protocol is binary: either accept the original stop as placed, or close the position and re-plan a fresh entry with a new invalidation level. Widening risk mid-trade is never one of the two acceptable options.
Crypto Wallets
Once you are holding assets rather than actively trading them every day, the question shifts from order entry to custody: where should your crypto actually sit?
A simple decision tree helps here. Keep funds on the exchange, a CEX, when you are trading frequently, since moving assets on- and off-exchange for every trade adds withdrawal fees, minimums, and delay that erode an active strategy. Move funds into a personal wallet for long-term holdings you do not plan to trade in the near term, since self-custody removes exchange counterparty risk for assets you are not actively using. The trade-off is that you accept full responsibility for storing them safely.
As a rough operational rule: the more frequently you trade a given balance, the more sense it makes to leave it on the exchange. The longer your intended holding period and the higher your risk tolerance for managing your own security, the more sense it makes to withdraw to self-custody.

That distinction carries three practical implications:
- Recovery responsibility — with a custodial wallet, a support team can typically help you regain access if you lose credentials; with a non-custodial wallet, losing your private key or seed phrase means permanently losing access to the funds, with no support desk to call.
- Withdrawal friction — custodial wallets, being exchange-managed, may impose withdrawal limits, fees, or delays; non-custodial wallets let you move funds on-chain at will, limited only by network fees and confirmation times.
- Counterparty risk — funds in a custodial wallet remain exposed to the exchange’s own solvency and security practices, whereas non-custodial wallets remove that specific risk entirely, shifting it instead onto your own key-management discipline.
Neither structure is universally “correct.” It depends on how you weigh convenience against control. What matters is choosing deliberately, based on your actual trading frequency and risk tolerance, rather than defaulting to whichever your exchange happens to have set up for you.
Micro-Budget Trading
Minimum Starting Capital
How much do you need to start trading crypto? “Minimum to trade” and “minimum to actually learn something” are two different numbers. Many platforms will let you open a spot position with as little as $10, and that figure is real — but it describes the exchange’s minimum order size, not the amount you actually need to survive normal volatility and fees on the pair you intend to trade. The practical minimum is almost always higher, because it has to leave room for the bid-ask spread, trading fees, and — critically — a stop-loss placed at a sensible distance rather than crammed uncomfortably close just to fit your account size.
Here is the mechanic in a concrete example. Say you fund an account with $10 and buy a major pair. If the spread and trading fee together cost you roughly 0.3–0.5% round trip, you have already given up several cents before the price has moved at all. Once you also try to hold back even 1–2% of that $10 as defined risk on a stop-loss, you are working with a position so small that a single tick of slippage can wipe out the entire theoretical “risk budget” you set aside.
You can technically place the trade — the exchange will accept it — but you have almost no room left to apply any of the risk controls. That defeats the purpose of the trade as learning.
Position Sizing
Once your capital is feasible, the next question is how much of it to put into any single trade. The answer should come from a formula, not a feeling: Position size ($) = account size × risk per trade ÷ stop distance (%)
Stop distance is simply how far in percentage terms price has to move against you before your stop-loss triggers and closes the trade. It is the distance between your entry price and your invalidation stop, expressed as a percentage of your entry price rather than a raw dollar amount.
If your account size is $200, you are risking 2% per trade, or $4, and your stop distance is 4% away from entry, then the position size should be $200 × 0.02 ÷ 0.04 = $100. That $100 is how much you would actually put into the trade — not your full account, and not an arbitrary guess.

On very small accounts, the math often forces one of two uncomfortable outcomes. Either your stop distance has to shrink to an unrealistically tight percentage just to keep position size sensible, which means normal price noise stops you out repeatedly before any real move plays out, or your position size shrinks so far that trading fees and the spread consume a large share of any potential gain.
If you run the formula and find your stop distance is tighter than the asset’s normal volatility, or your resulting position size is small enough that round-trip fees eat a meaningful chunk of it, that is the signal to pause live trading and return to paper trading. Forcing a trade that structurally cannot work is not discipline.
Trading Fee Control
On a micro budget, fees are not a rounding error. They are often the single biggest determinant of whether a strategy can work at all. Fees for trading cryptocurrency come in various forms and you encounter them at different stages of the process.
- Maker fee / taker fee — the trading fee charged for adding liquidity to the order book, maker, versus removing it, taker. Tactic: use limit orders rather than market orders when the trade does not require immediate execution, since limit orders that rest on the book typically qualify for the lower maker fee rate.
- Spread / instant-buy markups — the built-in cost of one-click “simple buy” interfaces, which often price through a wider spread than the advanced order-book view. Tactic: avoid the simple-buy button on a micro budget and route orders through the standard trading interface instead, where the pricing is closer to the actual order book.
- Withdrawal fees and minimums — flat or network-based charges every time you move funds off the exchange. Tactic: batch withdrawals into fewer, larger transfers rather than withdrawing small amounts frequently, since a flat withdrawal fee applied to a $15 withdrawal is a far larger percentage hit than the same fee applied to $150.
- Slippage from thin execution — the hidden cost of your order filling at a worse average price than quoted, common when a small order still has to walk through a thin order book. Tactic: stick to high-liquidity, high-volume pairs and avoid thinly traded books, where even a modest micro-budget order can move the price against you.
Before entering any trade, run a one-line break-even check to see how far price needs to move just to cover round-trip costs: Required move (%) = buy fee % + sell fee % + spread %
That is the sum price needs to move in your favor for you just to break even, before any profit begins. If your target move is barely larger than that number, the trade is not offering enough edge to justify the fees involved. A stablecoin parked on the sidelines costs you nothing, while a marginal trade can quietly cost you more than it earns.
Small Account Mistakes
Small accounts do not just lose money slower than large ones. They lose it in specific, avoidable ways that compound fast because there is so little capital cushion to begin with.

First, overtrading or churning through many small trades in a short window results in fees and spread accumulating across trades that never had a real edge, quietly draining the account regardless of individual trade outcomes. Set a hard cap on trades per day or week, matching the discipline built during paper trading.
Second, market orders in thin order books to save time make the order walk through multiple price levels, producing slippage that can exceed the intended risk on the trade. Default to limit orders on illiquid pairs, and reserve market orders for genuinely deep, high-volume books.
Third, chasing small-cap volatility because the percentage moves look more exciting than a major pair’s means wider spreads and higher slippage eat into any gains, and gaps can trigger stops at far worse prices than planned. Stay on higher-volume, higher-liquidity pairs while capital and experience are both limited.
Profit Expectations and Income Goals
Realistic Profit Targets
Before you set any profit number, set a hierarchy. Vague goal-setting — “make money consistently” — is what quietly pushes beginners into oversized positions and revenge trades.
Define your goals in this order, and do not skip ahead:
- Process goals first — a measurable target for how often you actually follow your own plan, such as the percentage of trades taken that matched your predefined entry, exit, and sizing rules.
- Risk goals second — a hard ceiling on loss, expressed as a maximum daily loss and a maximum weekly loss in dollar or percentage terms, decided before you place a single trade.
- Profit goals last — only once the first two are in place does a profit number mean anything, because a profit target with no process or risk backing it is just a wish.
For example, a goal can be defined as 80% of trades taken according to plan; maximum daily loss capped at 2% of account equity; maximum weekly loss capped at 5% of account equity; a modest monthly account growth target treated as a byproduct of hitting the first two, not a standalone commitment. These numbers exist to show the shape of a goal hierarchy. Your actual figures should reflect your own risk tolerance and account size, not this example.
A steady, high monthly percentage return sounds achievable on paper, but run the arithmetic honestly and it rarely survives contact with real trading conditions for a beginner. The two biggest drags are trading costs — fees and spread eating into every single entry and exit, win or lose — and variance, meaning losing streaks that are a statistically normal part of any strategy, even a genuinely profitable one over a longer sample.
Income Consistency
One distinction beginners consistently miss: trading income, meaning cash you withdraw, is not the same thing as account equity growth, meaning the underlying value of your account holding steady or compounding over time.
Early on, you should be measuring progress primarily through the second: how stable your equity curve is and how closely your actual behavior matches your plan. An account that grows slowly but smoothly, with few large drawdowns, reflects a repeatable process. An account that shows one lucky spike followed by a give-back does not, even if a withdrawal happened to land during the spike.

Do not plan bills around unrealized P&L. A position that looks green on your screen is not spendable money until it is closed and settled. Building a monthly budget around a number that can reverse before you act on it is how a paper gain turns into a real problem. If you do intend to withdraw trading proceeds, run that withdrawal through a separate budget line — funded only after gains are realized and fees accounted for — rather than treating your live trading balance as an extension of your regular income.
Loss Management
Drawdown, defined simply, is the decline in your account equity from its most recent peak to its lowest subsequent point. Managing it is a separate discipline from the stop-loss mechanics covered earlier. Drawdown control operates at a higher level, governing how much cumulative damage you allow before you stop trading altogether. Here is a three-tier circuit breaker you can use:
- Trade-level: Hard rule — after a stop-loss is hit, no re-entry into the same setup within the same session. Recovery action — log the trade in your journal and confirm the invalidation was genuinely reached before considering a fresh, unrelated entry.
- Day-level: Hard rule — stop trading for the day once your predefined maximum daily loss is hit, or after two consecutive rule-breaks, whichever comes first. Recovery action — close the platform and review the day’s journal entries before the next session rather than immediately re-engaging.
- Week-level: Hard rule — stop live trading for the remainder of the week once your maximum weekly loss is reached. Recovery action — reduce position size for the following week, or step back to paper trading temporarily if the drawdown coincided with repeated rule-breaks rather than normal variance.
Drawdown is not only produced by losing trades. Fees and churn can quietly erode equity even when your win rate feels acceptable. A string of small, correctly-called trades can still net negative once trading costs are subtracted on both sides of every entry and exit. Track net P&L after fees, not win rate alone, to catch this before it compounds.
Skill Development Timeline
Skill progression in trading is better measured by graduation criteria than by a calendar. Two traders can reach the same competence level in very different amounts of time.
When you can place, monitor, and close a spot order without hesitating over which field is active or which order type you selected, and you can locate your fee and fill history without help, is the first step. Next, your consistency scorecard needs to show a high share of planned trades taken and impulsive trades avoided across multiple consecutive weeks, not just one good week. Then, when you can point to a defined setup, applied consistently over a meaningful sample of trades, with a journal showing the specific conditions that made each entry valid — rather than a scattered mix of unrelated trade ideas, you meet one more criteria for graduation to real trading. And finally, your process and risk goals have held steady even as position size increased slightly, with no corresponding rise in rule-breaks or impulsive entries.
Do not expect this progression to move in a straight line. Volatility shifts — periods where the market’s typical range and behavior change meaningfully — can make a previously working setup look broken for a stretch, or make a beginner’s account look temporarily stronger than their actual skill justifies.
Judge your progress by rule adherence and controlled, capped losses through those regime changes, not by how quickly you are moving through the phases. A trader who takes longer but keeps drawdowns contained is further along than one who scales fast and gets bailed out by a favorable stretch of volatility.
Conclusion
You now have the full sequence: understanding market structure and price drivers, setting up and verifying an exchange account, placing and monitoring a first spot trade, choosing a strategy lane, protecting capital with stop-losses and proper position sizing, and setting profit expectations that match reality rather than marketing claims.
None of these steps work in isolation. A well-placed stop-loss means little without correct position sizing behind it, and a defined strategy lane means little if emotional trading overrides it in the moment.
Crypto markets will still be open at 3 a.m. next week, next month, and next year. There is no structural reward for rushing the fundamentals covered here, but there is a very real cost to skipping them.
Start small, keep your risk defined before you click confirm, and let your process — not any single trade — be the thing you are actually optimizing for.
Frequently Asked Questions
How much money do you need to start trading crypto?
There is no single dollar figure here. The true floor is set by each exchange’s minimum order size, and many platforms will let you open a position for as little as $10. In practice, though, your workable minimum sits higher than that number, because fees and the bid-ask spread take a disproportionately larger bite out of a tiny position than a properly sized one.
How do you keep your crypto safe?
Split your holdings into trading money that stays on the exchange for active positions, and savings that get moved into a personal wallet where you — not a third party — hold the private key.
Before transferring anything substantial, send a small test withdrawal first and confirm it arrives correctly.
What drives crypto prices?
Price movement generally comes down to four buckets: market-wide liquidity conditions, token-specific supply and demand, news and narratives, and short-term microstructure effects like liquidations. The interplay between them is a big part of what produces the volatility beginners often find disorienting at first.
How do you know when to sell?
You decide before you ever enter the trade. Define what invalidates the setup and what profit-taking looks like in advance, so selling becomes execution of that plan rather than a reaction to how you feel in the moment.
One nuance worth tracking against your cost basis: selling back into the currency you started with closes the trade cleanly, while selling into a different asset is a rotation rather than an exit. Mixing the two up means closing the wrong leg of your position.