
The Best XRP Wallets in 2026: Review & Guide

Key Takeaways
- 🔘 There is no single best XRP wallet for every user. The right choice depends on custody model, transaction frequency, XRPL feature needs, and whether XRP is your only asset or part of a broader multi-chain portfolio;
- 🔘 Xaman is the strongest fit for active XRP Ledger users, Tangem is a practical cold-storage option for long-term holders, and Trezor and Ledger remain the main hardware wallet brands to compare for dedicated device security;
- 🔘 Trust Wallet is better suited to mobile multi-asset users, while beginners should prioritize wallets with clear destination tag prompts, simple backup flows, and readable send/receive screens;
- 🔘 The XRP Ledger has wallet-specific mechanics that cannot be ignored: account reserve, destination tags, and trust lines all affect whether a transfer clears smoothly;
- 🔘 There is no “official Ripple wallet” or “official XRP wallet.” The XRP Ledger is open-source, so any wallet using that claim as a trust signal should be treated with caution.
Disclaimer
This guide is for informational purposes only and does not constitute investment, legal, tax, or custody advice. Self-custody involves irreversible responsibility: if you lose your recovery material or approve a malicious transaction, there may be no institution able to reverse the loss. Wallet features, fees, supported assets, reserve figures, and app interfaces can change, so readers should verify current details directly inside the wallet, on the XRP Ledger, or through the relevant provider before moving funds.
Choosing the right XRP wallet in 2026, as always, goes beyond seeing it in the list of supported assets: you have to weigh self-custody versus custodial control, hot versus cold storage, and XRP-only depth versus multi-chain convenience. Instead of naming one universal winner, this guide separates the strongest options by use case.
In particular, XRP Ledger has its own requirements, including the account activation reserve and destination tags, and these details can decide whether a transfer clears instantly or gets stuck in manual review. A good XRP wallet is not merely one that displays XRP; it is one that handles XRPL-specific operations clearly and safely.

If you need to catch up with what XRP is, look no further than in our Beginner’s Guide.
Top XRP Wallets by Category and User Type
Xaman for XRP Ledger Apps and Power Users
Best for: Users who interact directly with XRPL-native apps and sign transactions frequently.
Xaman is built specifically around the XRP Ledger, and that is its main advantage. Features like trustlines, DEX offers, and NFT minting are not treated as secondary extras but as native parts of the workflow.
Why it fits:
- Built specifically for the XRP Ledger, so features like trustlines, DEX offers, and NFT minting are natively supported rather than bolted on;
- Deep integration with XRPL dApps means a user connecting to a decentralized exchange or an XRPL-based lending app can approve transactions in-app without switching tools;
- The XRP Ledger's expected 3–5 second settlement means a power user submitting several transactions in a session — swapping tokens, updating trustlines, sending payments — sees near-immediate finality.
This is the wallet category where the difference between “supports XRP” and “understands XRPL” becomes most obvious. If you are actively managing positions, approving app interactions, or using issued XRPL tokens, interface depth matters.
Tradeoffs:
- You hold significant multi-chain assets outside the XRP Ledger, since Xaman's strength is XRPL depth, not breadth across other networks;
- You want a “set and forget” cold storage setup rather than an active signing tool.
Quick pick: If you regularly sign XRPL transactions or use XRPL apps, Xaman is the practical default.
Tangem for Cold Storage and Long-Term Holders
Best for: Holders who want cold storage without managing a traditional hardware device.
Tangem approaches XRP custody from the opposite direction: not active XRPL app interaction but long-horizon storage. Its card-based design keeps private keys offline while avoiding the familiar hardware-wallet maintenance loop of cables, screens, batteries, and firmware updates.
Why it fits:
- Card-based self-custody keeps keys offline while avoiding batteries, screens, or firmware updates to maintain;
- Tangem cards carry a 25-year limited hardware warranty, a longevity signal that matters if you are planning to hold XRP for a decade or more without touching the device;
- Physical simplicity — tap-to-sign — reduces the interaction surface compared to multi-button hardware wallets.
The value proposition here is discipline. A wallet that is less convenient for everyday use can be better for funds you genuinely do not intend to move often. If you would like to, Tangem App’s features let you make more of your funds than just let them sit there; find out an example in our guide on how to swap in Tangem with ChangeHero.
Tradeoffs:
- You need frequent, active transaction signing — Tangem is built for infrequent, long-horizon access, not daily use;
- You should factor in access continuity: since the card itself is the credential, long-term holders need a plan for backup cards or replacement before a single card is lost, damaged, or ages out.
Quick pick: Choose Tangem if you are locking in XRP for years and want cold storage without hardware-wallet complexity.
Trezor for Hardware Security
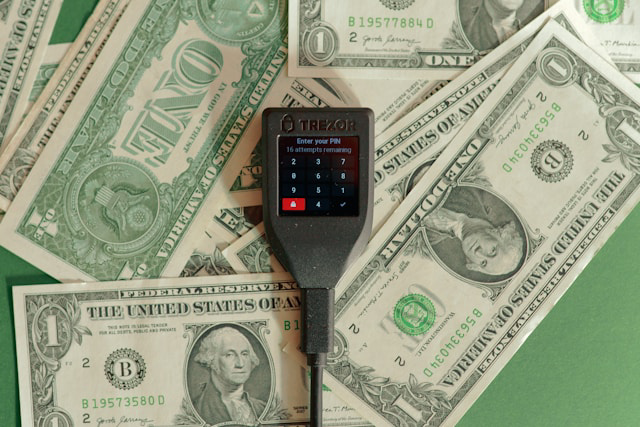
Best for: Users who want dedicated hardware wallet protection and are comparing established brands.
Trezor occupies the more traditional hardware wallet category. The premise is straightforward: private keys are isolated from internet-connected devices, and signing happens on a dedicated device rather than inside a general-purpose phone or laptop.
Why it fits:
- These devices isolate private keys from internet-connected devices, which is the core value of any hardware wallet for XRP self-custody;
- Trezor's Model T supports XRP alongside over 1,600 other cryptocurrencies, giving buyers a concrete breadth datapoint if they expect to diversify holdings later;
- Its ecosystem leans on its companion software and broader third-party app integrations, which some users prefer for day-to-day portfolio management.
Two decision levers matter most without requiring deep technical knowledge: ecosystem/software preference and supported-assets breadth. Price is also a starting anchor because mainstream hardware wallets in this category start around $79.
Tradeoffs:
- You want the absolute simplest onboarding — hardware wallets add a learning curve compared to mobile-only apps;
- You are not ready to spend on a physical device when a well-secured software wallet might suffice for smaller holdings.
Quick pick: Choose Trezor if broad coin support and open-source firmware matter most to you.
Trust Wallet for Mobile Multi-Asset and DeFi Users
Best for: Users managing XRP alongside assets on many other blockchains from a single mobile app.
Trust Wallet is not an XRP-specialist wallet. Its strength is breadth. For users who hold XRP as one asset among many, that can be the more practical tradeoff.
Why it fits:
- Supports a wide range of blockchain networks, so if you regularly hold assets across multiple chains, you are not juggling separate apps for each one;
- Built-in DeFi and dApp browser access lets you interact with decentralized protocols directly from the same interface holding your XRP;
- Backed by meaningful scale — Trust Wallet's multi-chain coverage and user base give it credibility as a general-purpose crypto wallet, not just an XRP afterthought.
Two signals suggest Trust Wallet is the right fit: you regularly hold assets on many networks, and you need one mobile app to view and manage them without constant switching.
Tradeoffs:
- You expect XRPL-specific feature depth — multi-chain support does not mean every XRPL capability, like advanced trustline management, is as fully built out as it is in an XRPL-native app;
- You are prioritizing cold storage over convenience, since this remains a hot wallet by design.
Quick pick: Pick Trust Wallet if mobile convenience across multiple chains outweighs the need for XRPL-specific depth.
Beginner-Friendly XRP Wallet Options
First-time self-custody users who need clear guardrails before handling XRP directly.
“Beginner-friendly” should not mean simple interface for the sake of it or vague reassurance. It should mean measurable, checkable safeguards inside the app.
A beginner-friendly XRP wallet should provide:
- A guided receive/send flow that walks through each step;
- Explicit prompts for destination tags, especially when sending XRP to exchanges;
- A simple, clearly labeled backup and recovery process during setup;
- Clear warnings when the user is about to send to a custodial platform or shared deposit address;
- A readable restore process that can be tested before meaningful funds are deposited.
If a wallet buries these steps or fails to flag destination tag requirements before you send, it is not actually beginner-friendly regardless of the marketing copy.

Tradeoffs:
- You are already comfortable with self-custody fundamentals — these guardrails may feel like unnecessary friction for experienced users.
Quick pick: For occasional use with guided prompts, Xaman's XRPL-native flow is a reasonable starting point. If you also hold other crypto and want one simple app, Trust Wallet works similarly. Other multi-asset software wallets that some beginners compare in this category include Exodus and Edge, but the same onboarding yardsticks still apply: clear tag prompts, a readable backup flow, and straightforward restore testing.
If you plan to hold long-term from day one, moving to a hardware wallet or Tangem early — once you are confident in the receive/send basics — avoids relearning custody habits later.
XRP Wallet Types and Custody Tradeoffs
What preceded this part of the rating was the brief version; now is the time to cover more ground. Before comparing apps and devices too closely, define the category first. Every XRP wallet is some combination of custodial or non-custodial, hot or cold, hardware or software. These categories determine who can move funds, where the keys live, and how much operational responsibility falls on you.
Hot Wallets and Cold Wallets
The hot-versus-cold distinction is about internet connectivity, but the real choice comes down to usage pattern.
A hot wallet is connected to the internet and fits XRP actions such as:
- Frequent sends and receives;
- Regular interaction with XRPL apps;
- DEX trades;
- Trustline updates;
- NFT activity;
- Any pattern where funds move multiple times a week.
A cold wallet is kept offline and is built for long-term holding: XRP you do not plan to touch for months or years and want to be insulated from online exposure.
That being said, cold storage is not an automatic upgrade in every situation. Moving XRP from cold storage usually adds steps — retrieving the device, verifying the transaction on a separate screen, sometimes signing offline before broadcasting. You are trading convenience for reduced exposure, which often only increases the friction intentionally.
Custodial Wallets and Non-Custodial Wallets
Custody, or who actually manages and owns the addresses, is tested simply: who can move funds without your approval?
In the most common custodial wallet scenario, an exchange like Coinbase or Uphold holds your private keys. That means the platform technically has the ability to move, restrict, or freeze funds under its own policies. In a non-custodial wallet, only you hold the keys or recovery material, so no third party can authorize a transaction on your behalf.
The failure modes differ sharply.
- If your exchange account login is compromised, the exchange's fraud detection and account-recovery systems may catch or reverse some unauthorized activity;
- If your self-custody recovery material, or seed phrase, is compromised, there is no institution to appeal to. Whoever has the seed phrase has permanent, irreversible control over the funds.
This is the core tradeoff. Custody is not only about control; it is also about which kind of failure you are prepared to manage.
Hardware Wallets and Software Wallets
Hardware versus software is a separate axis from hot versus cold, and conflating them causes confusion.
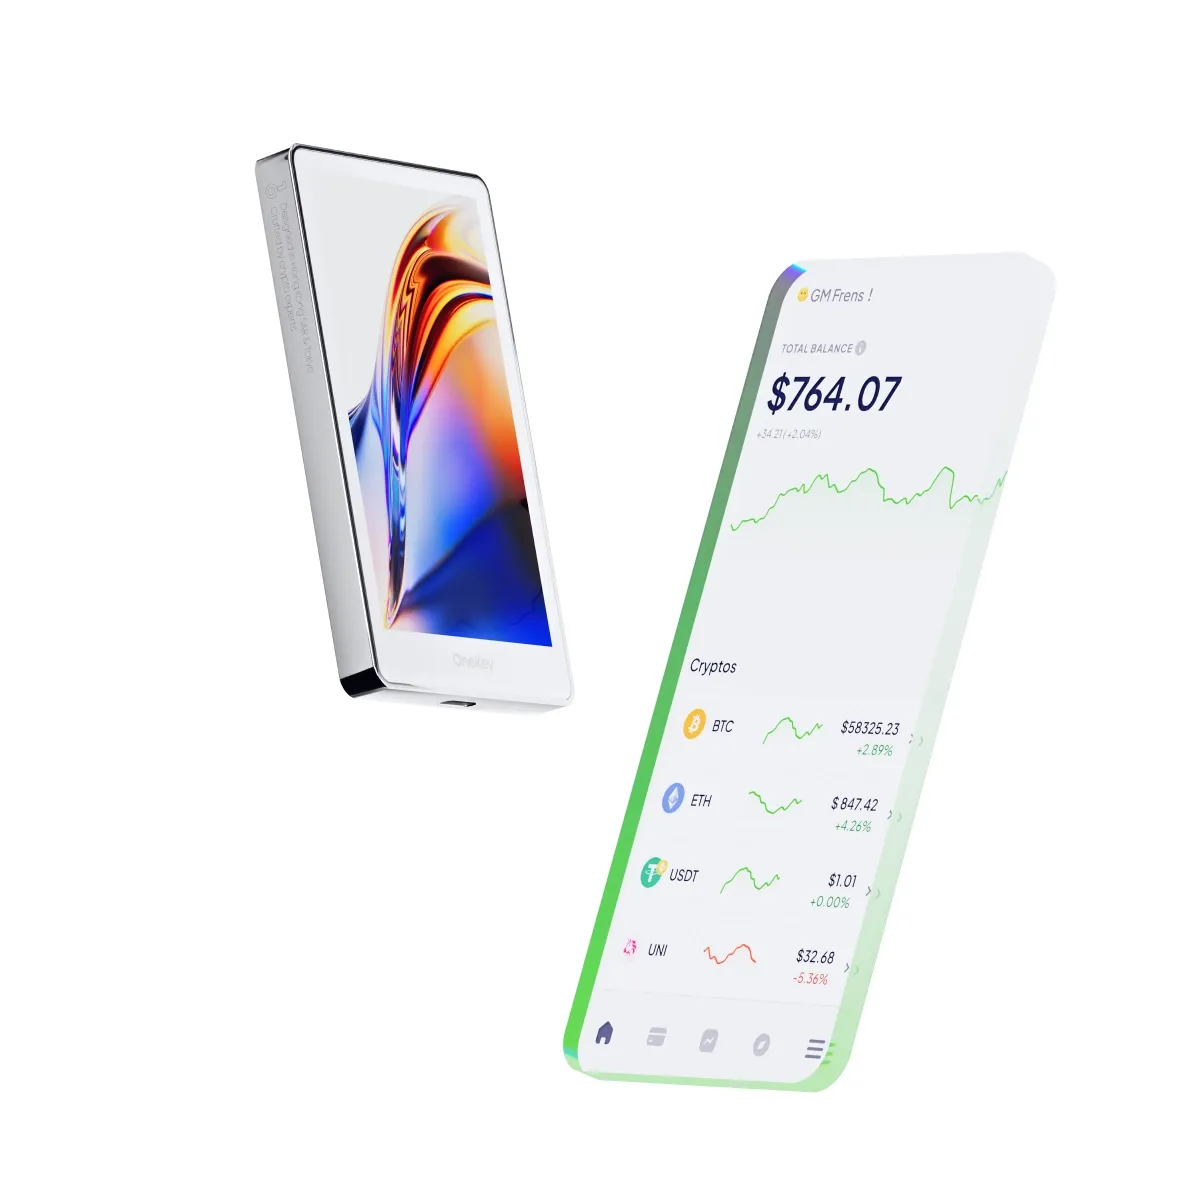
This distinction is about where keys live and where signing happens:
- A hardware wallet uses a dedicated device isolated from general computing;
- A software wallet generates and signs transactions on a general-purpose device like a phone or laptop.
The tolerance for friction is the decision lever for this distinction as well, though. Can you accept an external signing step — unlocking a separate device and confirming on its screen — every time you send XRP? If yes, a hardware wallet adds security with manageable overhead. If you need fast, in-app signing for frequent XRPL activity, a software wallet fits better, with the tradeoff of greater exposure.
Self-Custody Control and Seed Phrase Responsibility
Choosing self-custody means taking on ongoing operational duties, not just completing a one-time setup screen.
Keep this checklist tight:
- Maintain continuity of recovery access — know where your seed phrase or recovery material is at all times;
- Keep backups readable and durable over time because ink fading, water damage, and file corruption are real risks;
- Plan for device loss or failure before it happens, including how you would restore access on a replacement device;
- Periodically verify that your backup actually works rather than assuming it does.
This is the part many users underestimate. The wallet app is only the interface; the recovery material is the real continuity plan. For more tips, see our guide on securing the seed phrase of your wallet.
XRP Wallet Security and Recovery
Choosing a wallet type is only half the security equation. How you handle signing, backups, device access, and phishing attempts determines whether your XRP stays safe after setup.
Offline Signing and Device Security
A secure signing workflow separates three locations:
- Where the private key lives — ideally on an isolated device, such as a hardware wallet or offline signer, that never exposes the key to an internet-connected environment;
- Where the transaction is constructed — typically your phone or laptop app, which prepares the unsigned transaction, including destination, amount, and network details;
- Where approval/signing occurs — back on the isolated device, where you verify the transaction details on its own screen before authorizing it.
Operational tradeoff: offline or hardware signing dramatically shrinks the remote-attack surface. Malware on your phone cannot reach a key it never touches. However, this only works if you verify what you are signing. Skipping the on-device confirmation step reintroduces risk: approving the wrong address, missing a destination tag, or confirming a manipulated prompt because you clicked through without reading it.
The hardware does not protect you if you treat the confirmation screen as a formality.
Device hardening actions worth executing:
- Keep OS and wallet apps updated on a regular cadence — unpatched software is a common entry point for malware targeting stored keys or clipboard data;
- Install only from official app stores or verified vendor sites — sideloaded or third-party installs are a primary vector for fake wallet apps;
- Dedicate a separate device or profile for wallet use — isolating signing activity from everyday browsing reduces exposure to clipboard hijacking;
- Avoid rooted or jailbroken devices for wallet apps — these environments disable OS-level protections that otherwise block unauthorized remote access;
- Disable risky developer options, including USB debugging and unknown-source installs — leaving these enabled gives remote-access tools an easier path into the device holding your signing app.
Backup Methods and Recovery Phrases
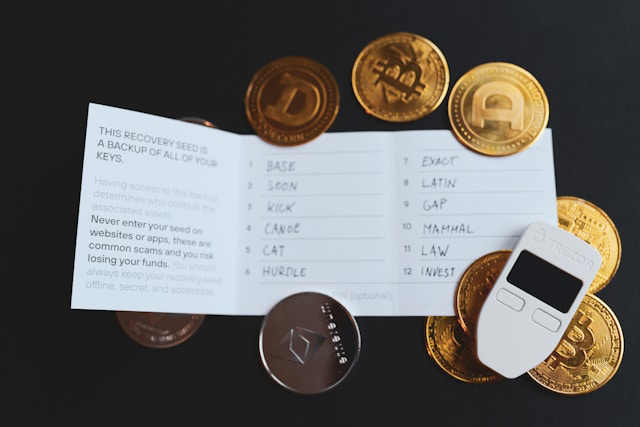
What you need to back up depends on wallet type, with only some overlaps:
- Recovery phrase / seed phrase: the mnemonic phrase generated at setup — usually 12 or 24 words — that fully reconstructs your private key;
- Hardware-wallet recovery words: functionally the same as a seed phrase but generated and displayed by the device itself;
- App-level backups: encrypted cloud or local backups of app settings can be useful for convenience, but they are not a substitute for the seed phrase unless the app explicitly states otherwise;
- Optional passphrase: an additional secret some wallets let you add on top of the seed phrase. If enabled, it must be backed up separately and with equal care.
Decision rule: if you cannot restore your wallet on a fresh, unrelated device using only what you have backed up, you do not have a real backup — you have a false sense of security.
Recovery drill:
- Take a spare device, or the same device reset to factory settings, ideally offline or in airplane mode;
- Install the wallet app;
- Restore using only your backed-up recovery phrase or hardware-wallet words;
- Confirm the first receiving address generated matches the address you expect from your original wallet;
- If it matches, your backup is verified. If it does not, stop and re-check your backup material before trusting it;
- Wipe the test device or reset the app afterward so no duplicate active wallet lingers unmonitored.
Biometric Access and PIN Protection
Biometric authentication and PIN codes control local access to the app or device. They do not replace control of your recovery material, covered above. Someone who bypasses your phone's lock screen still cannot move funds without the seed phrase or private key. Conversely, someone who obtains your seed phrase does not need your phone's biometric authentication at all. Treat these as separate layers of defense, not interchangeable ones.
Prioritized lock setup order:
- PIN/passcode — the fallback that always works, even if biometric authentication fails or is disabled;
- Biometric authentication — fingerprint or face unlock as a convenient daily-use layer on top of the PIN;
- Auto-lock timeout — set it short because a wallet app left unlocked on an idle screen defeats both prior layers;
- Secure notifications and lock-screen settings — prevent transaction details or balances from displaying on a locked screen.
Two scenarios are worth planning for in advance:
- Phone theft: trigger remote wipe if available, lock the associated account or app remotely, and ensure your SIM has carrier-level protection against unauthorized transfer;
- SIM swap / number takeover: avoid relying on SMS-based codes for wallet-related access where possible. Prefer device-bound authentication methods that do not depend on your phone number.
Phishing and Fake Wallet Prevention
A crypto wallet scam or attack rarely announces itself. It usually mimics a legitimate wallet download, app, or approval prompt closely enough to fool a quick glance.
Before installing anything, run an authenticity check: verify the official domain or app store publisher listing directly rather than trusting a link from search or social media. Avoid ad-sponsored search results for wallet downloads because paid placement does not verify legitimacy. If the vendor provides a checksum or digital signature for the download, verify it before installing. Never install an APK or app file sent directly via DM, email attachment, or unsolicited link, regardless of how official it looks.
Before approving any transaction, confirm:
- the destination address matches exactly what you intended to send to;
- the amount shown on the approval screen matches what you entered;
- the network context, namely XRP Ledger and the correct chain, is correct before signing;
- If the wallet supports destination tags or memos, confirm whether one is required before you approve. If you need help locating them, check our destination tag guide.
If you think you are compromised, act in this order:
- Put the affected device into airplane mode immediately to cut off remote access;
- Generate a new wallet on a separate, clean device;
- Do not reuse the potentially compromised private key or seed phrase;
- Move remaining funds to the new wallet as soon as it is ready;
- Revoke or disable any connected app sessions or authorizations tied to the old wallet where the platform allows it;
- Document the compromised address and any relevant transaction IDs, or txids, for your own records;
- Only after funds are secured should you begin troubleshooting how the compromise happened.
XRP Transfers and Network Requirements
Sending XRP looks simple: paste an address, enter an amount, confirm. The XRP Ledger adds a few structural rules that make the details matter. Account reserve, destination tags, trust lines, and withdrawal checks are not optional technicalities; they are part of the transaction path.
XRP Account Reserve
Every account on the XRP Ledger must maintain a minimum balance called the account reserve. This is why a brand-new address can show a balance yet still be unable to send the full amount.
The XRPL Mainnet requires a 1 XRP base reserve just to keep an account active, and that floor is not spendable. It exists purely to keep the account valid on the ledger.
The reserve does not stop at the base amount. Additional ledger objects owned by the account — including trust lines, offers, or escrows — each add an owner reserve on top of the base. Under current XRPL rules, qualifying ledger objects add 0.2 XRP per object to the amount that stays locked.
A quick example: fund an address with 25 XRP, and the 1 XRP base reserve immediately reduces what is usable to 24 XRP. If that account then adds one qualifying ledger object, such as a single trust line, the owner reserve adds another 0.2 XRP to the locked amount. The sendable balance drops to 23.8 XRP.
Attempting to send the full 25 XRP would fail with an insufficient-balance error, even though the account clearly holds that much XRP. Before attempting a full-balance send, check your wallet's spendable or “available” balance figure rather than the total balance.
Destination Tags
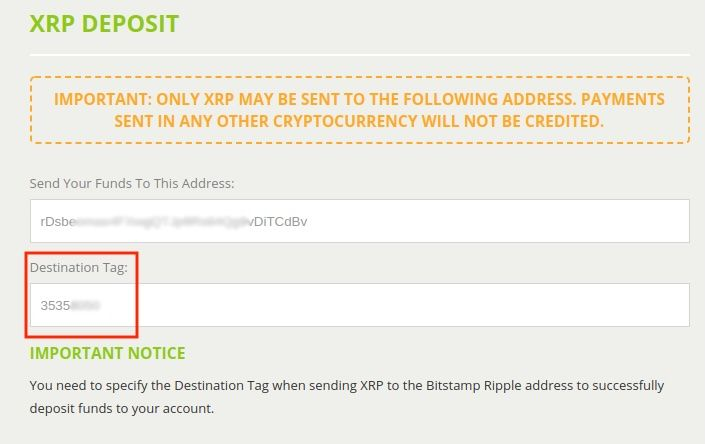
As already briefly mentioned, destination tag is a secondary identifier attached to an XRP payment. It tells the receiving system which sub-account or customer the funds belong to.
Whether you need one depends entirely on where you are sending:
- Personal self-custody wallets typically do not require a destination tag because the address itself uniquely identifies the recipient's account on the XRP Ledger;
- Custodial or exchange deposit addresses, on the other hand, often require one because many platforms pool customer deposits into a small number of shared addresses and use the tag internally to credit the correct account.
A missing or incorrect destination tag does not necessarily lose your funds, but it can delay crediting significantly and usually requires opening a support ticket with the receiving platform to manually match the deposit.
Some wallets and exchanges display XRP address information in slightly different formats or layouts, along with a separate tag field. Always follow the destination platform's stated format instructions precisely, particularly around where and how the tag is entered.
Trust Lines and XRPL Tokens
If you are only familiar with XRP itself, trust lines are the concept most likely to trip you up when receiving other assets on the network.
A trust line is an explicit allowance an account sets up to hold a specific issued token on the XRP Ledger. It is not automatic. Unlike XRP, which any activated account can receive by default, XRPL-issued tokens generally require the receiving account to create a trust line to that specific token and issuer before the token can arrive.
The practical implication is simple: you cannot always receive an issued XRPL token the moment someone tries to send it to you. If no trust line exists yet, the transfer typically fails or cannot be completed until one is set up.
Before receiving any XRPL token, check the following:
- Confirm the asset is actually an XRPL-issued token, not a token native to a different network;
- Confirm the issuer's address matches the token you expect;
- Remember that trust lines are issuer-specific, not just token-name-specific;
- Ensure the trust line for that token and issuer pair exists in your receiving wallet before the sender initiates the transfer.
One gotcha ties directly back to the reserve mechanics: since a trust line counts as an owned ledger object, adding one increases your account's owner reserve and reduces your sendable XRP balance accordingly.
Exchange and Wallet Withdrawal Checks
Before initiating any withdrawal or transfer, especially to or from an exchange, run through this checklist that is not limited to XRP:
- Confirm the destination address format the recipient platform accepts, and enter it exactly as instructed;
- Confirm whether a destination tag is required for this specific deposit, and double-check it is entered correctly;
- Confirm the destination account is already activated, or check whether the recipient supports account activation via first deposit if it is not;
- Confirm any minimum deposit or withdrawal thresholds the platform enforces;
- Confirm the platform is not currently in withdrawal maintenance or experiencing a deposit halt.
For larger amounts, treat the transfer as an operational reliability exercise rather than a one-shot action. Send a small test transaction first, confirm it is credited correctly — including proper tag routing if one applies — and only then send the remainder. This two-step approach catches address, tag, or platform-side issues while the exposure is still small.
Conclusion
The right XRP wallet is not a single universal winner: active XRPL participants benefit from tools built natively for the ledger. Long-term holders are better served by offline, low-maintenance storage. Users spreading assets across multiple chains need a wallet that does not treat XRP as an afterthought. None of these paths are inherently safer or riskier in isolation; they simply come with different tradeoffs in convenience, control, and ongoing responsibility.
On the XRP Ledger specifically, do not overlook the account reserve, destination tag requirements, and trust line mechanics. These are the differences between a transfer that clears and one that stalls.
Frequently Asked Questions
What is the safest XRP wallet?
There is no single “safest” XRP wallet. Hardware or cold-signing setups shrink the remote-attack surface compared to hot wallets, while custodial accounts shift key-management risk onto the exchange holding your funds.
The nuance that matters more than the category itself is operational reliability. A hardware wallet only remains the safer choice if you consistently back up your recovery material and verify every send detail on-device. Skip that discipline, and even top-tier hardware can still lead to lost funds.
Is there an official Ripple wallet?
No. There is no “official” XRP wallet because the XRP Ledger is open-source and no single app carries Ripple's official endorsement.
Any wallet marketing itself as “the official XRP wallet” should be treated as a red flag rather than a credibility signal. Before installing anything, verify its provenance directly through the official domain or your app store's listed publisher.
How much XRP is required to activate a wallet?
Activating an account on the XRP Ledger requires a 1 XRP base reserve, and that amount stays locked rather than spendable.
The important condition is that each additional qualifying ledger object your account holds, such as a trust line, adds to the account reserve. Under current XRPL rules, this is 0.2 XRP per object, so your actual sendable XRP can be lower than what your balance display shows.
Can I store XRP on a hardware wallet?
Yes. For instance, Trezor and Tangem both support XRP as cold-storage hardware options.
The practical detail to confirm before relying on either is the management interface. The device itself handles signing, while you usually send and manage XRP through companion software such as Ledger Live or a compatible interface. Check upfront that the interface you plan to use fully supports XRP send flows, including any required destination tag field when a receiving platform calls for one.
